

Hello friends! My latest (indoor) project was this large paper Dahlia. We had a windy weekend so I spent my time inside the house creating this little beauty. I love how it turned out! I also love how easy it was! I loved it so much that I am offering a class at the store in just 2 weeks to make them! Learn more here.
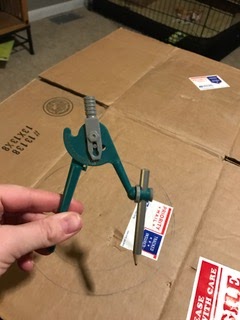
Step 1: Cut out a cardboard backing for the flower from scrap cardboard. I had a few boxes in the garage and just cut it from that. I used my protractor to draw my circle as well as some interior circles as guide lines.


Step 2: This part was surprisingly hard for me but I made it through. Tear out your book pages.

Step 3: Roll up the book pages and start gluing! I placed 4 pages at each "corner" (yes I KNOW circles don't have corners but you know what I mean!) as guides to help keep the line going straight.


Step 4: Keep on gluing! I then just filled in the center pf the flower. Roll, glue and repeat until complete.


I hung this guy up in our master bedroom and he looks great on our gray (or is it grey?) walls.

Join me at the store on March 24th at 6:00pm to make your own! All materials and supplies provided. Cost is just $20 per person and room is limited so RSVP to me by March 22nd.
Thanks for stopping by and have a great day!
No comments:
Post a Comment